There is also Change Log sub menu that is described below this screen shot (of a new project with no change log entries)
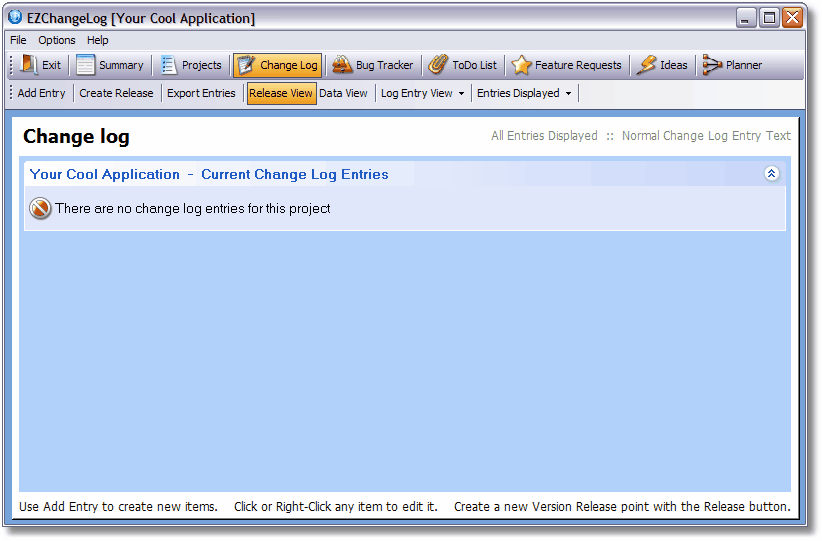
Add Entry - opens the Change Log entry form so you can add a new entry
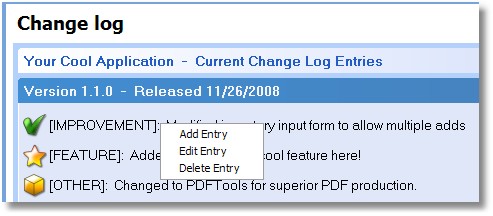
Note: Once an entry has been added, you simply click on it to edit it. You can also right-click on it to edit or delete it.
Another option is to change to a traditional data browse view by clicking the "Data View" button.
Note: if you right-click on a release header, then you will get the following popup menu:
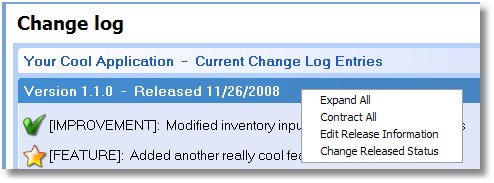
Expand All and Contract All will show or hide all the items in the selected release
Edit Release Information will allow you to edit the information in the release header.
Change Released Status will allow you to change the released status for a group of items (note this only works on the "last" or "current" release).
Create Release - this button will open a small window to gather release data. Then all items that are not yet released will be added to the new release and they will appear below the release header as shown here:
Export Entries - opens the Change Log export screen
Release View and Data View - toggles between the Release View (above) and the Data View (below)
Log Entry View - opens a pulldown menu where you can select how you want the change log entries displayed
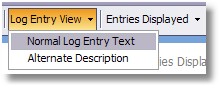
Normal Log Entry Text - the entries are displayed using the default log entry text
Alternate Description - displays the entry using an (optional) alternate text (only in the Professional Edition)
Entries Displayed - opens a pulldown menu where you can select which change log entries are displayed
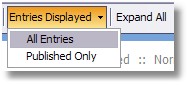
All Entries - all change log entries are displayed
Published Only - only entries marked for publishing are displayed
Expand All - expands all release headers **
Contract All - contracts all release headers **
** these buttons are only visible when there are change log entries for a project.