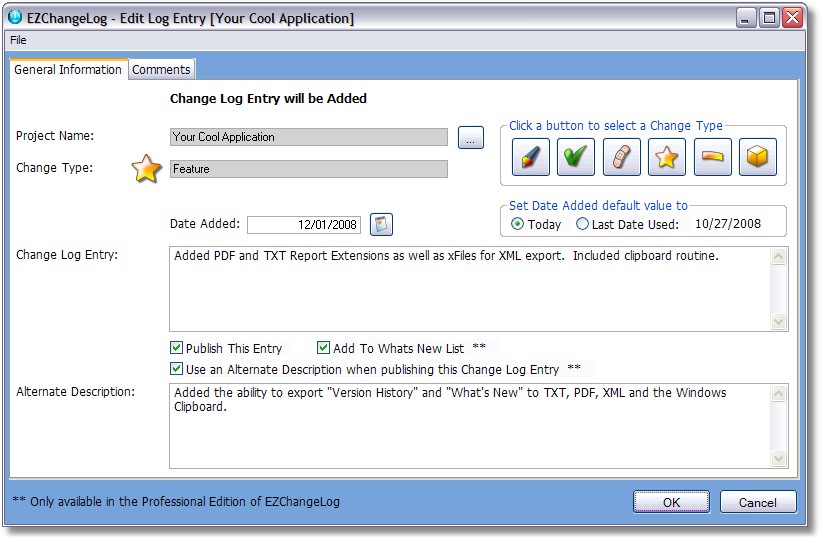
Project Name - this is automatically added based on the value in your Project setup.
Change Type - this defaults to "Change", but you can select the other change log type descriptions by clicking the Change Type icons:
Here are the default values (remember that you can change these in the Program Settings)
Change

Improvement

Fix

Feature

Regression

Other

Change Log Entry - this is where you type in the actual log entry.
Note: If you are using the Professional Edition, then other program features such as the ToDo List, Feature Requests, Bug Tracker, Ideas and Project Planner Items can all "send" a completed item directly into the Change Log. This is a big time saver!
Publish This Entry - selecting this option will cause this entry to be published when you export the change log. Entries that are not checked still appear in the internal change log, but only there.
Add to What's New List - selecting this option will cause this entry to be included when you export the "What's New" version of the change log. **
Note: This is a powerful feature of EZChangeLog because it allows you to use the same entry for two different sets of content.
Use an Alternate Description when publishing this change log entry - selecting this option will enable a separate entry field where you can put a different description that will be used when the entry is published. **
Note: This is another powerful feature of EZChangeLog because it allows you to keep the original change log entry (in whatever format is meaningful to you as a developer) and present a modified version to your end users in the exported view.
** These features are only available in the Professional Edition of EZChangeLog.
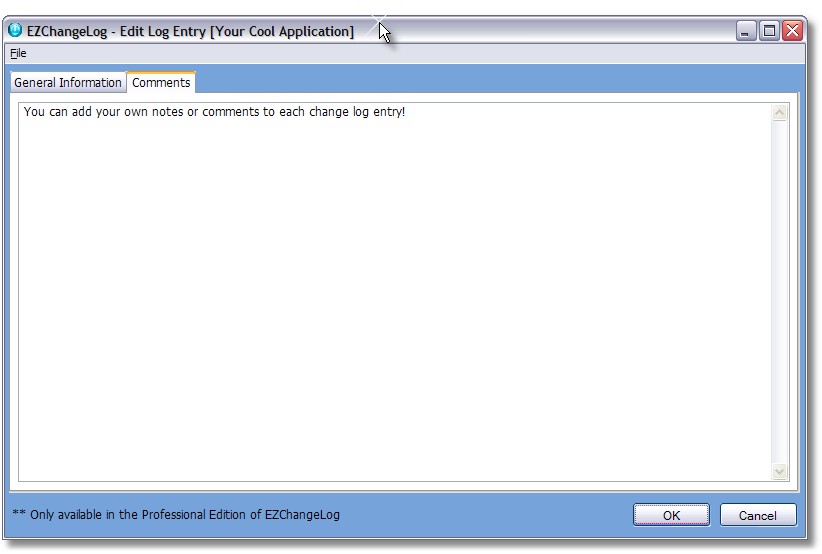
Comments - you can enter your own notes or comments for each change log entry.
When you click the OK button your entry is saved. If you click the Cancel button you will see this screen:
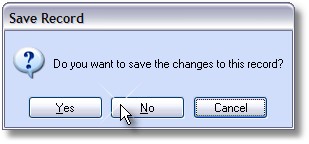
This extra step prevents you from accidentally losing your change log entry.
Note - there are three ways to delete an entry:
1) You can right-click on the entry in the Release View and select Delete from the popup menu.
2) You can switch to the Data View and use the delete button.
3) You can click on a entry in Release View to go into the Edit mode, then check the "Delete this Change Log entry when you click OK" box on the form as shown here:

(this option only appears in the EDIT mode of a change log entry).
If you check the box it will change the message from "Entry will be Changed" to "Entry will be Deleted". Then when you click OK the entry will be removed from the list.